linear__create_issue, slack__send_message_to_channel, and so on.
Wire a tool provider
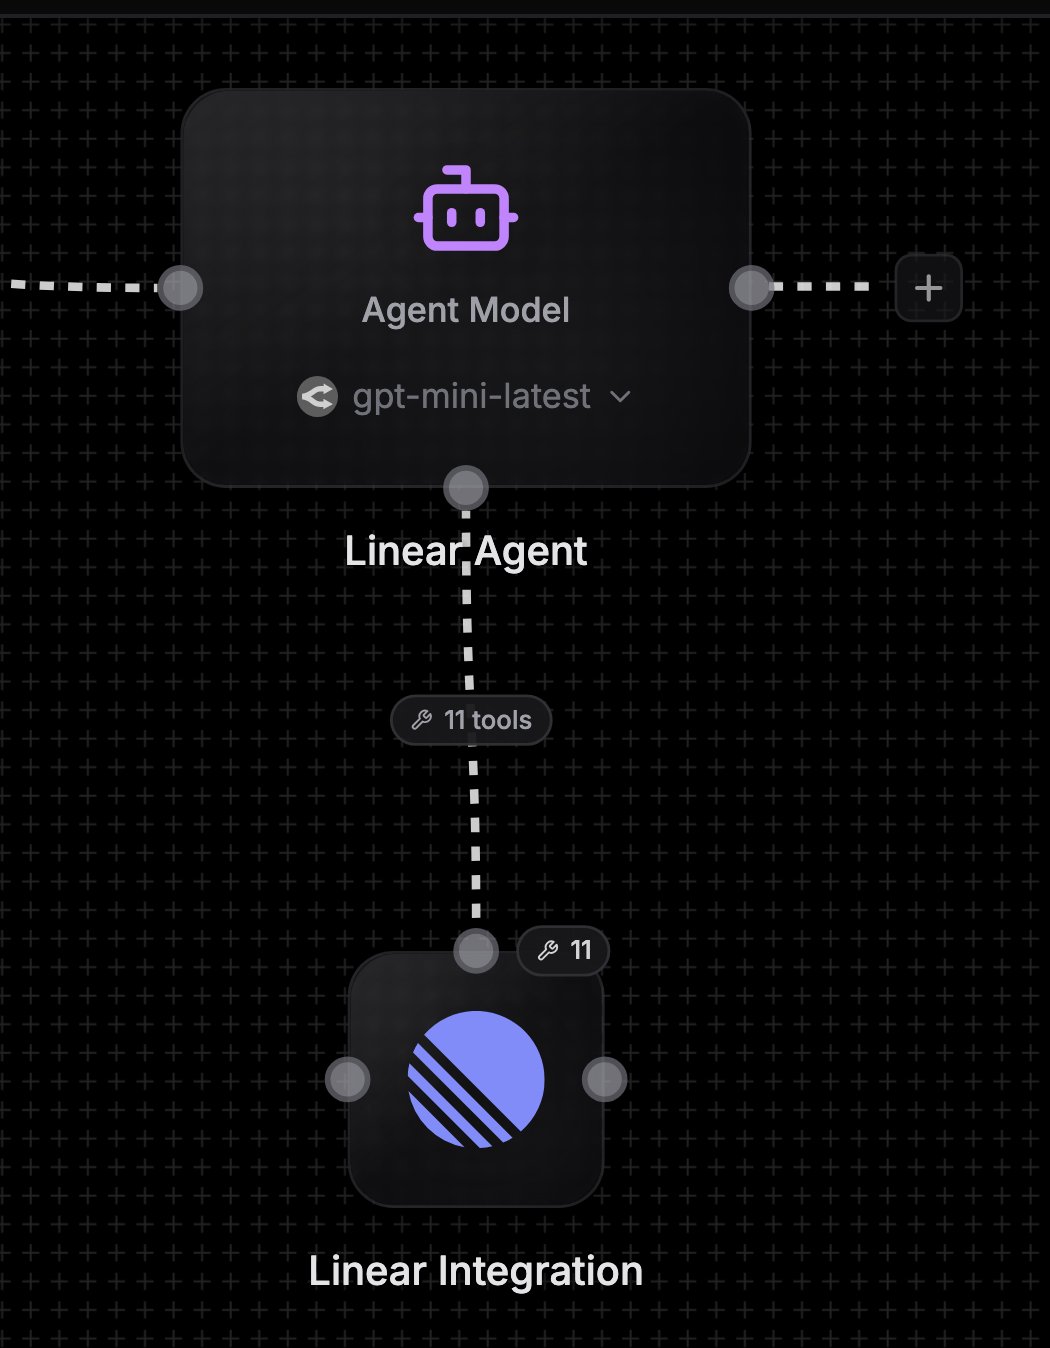
Connect the node to the agent
Drag an edge from the integration node’s top handle to the agent’s bottom handle. Or click Add tool in the agent’s config panel and pick the service from the palette, which creates and wires the node for you.
Pick the allowed actions
Once wired, the node’s config panel switches from a single-operation form to an operation allowlist. Search for actions, or use the quick selects: Read-only (list/get/search actions, no mutations), All, or Clear. For services with a long list of actions, the Show selected toggle filters the list down to just the ones you have allowlisted. The same picker appears in the setup view when you set up a tool-provider node.
Connect credentials
Attach the service credential as usual. The agent calls every tool with this credential.

Rules
- A tool provider is tools-only. It cannot also feed its output into normal dataflow nodes, and it cannot have a trigger operation selected.
- Use two nodes of the same service when you need both roles, for example one Slack node with a trigger operation wired into the agent’s input and a second Slack node wired as a tool provider with send operations allowlisted. This is the channel agent pattern.
- Multiple providers of the same service on one agent are fine: tool names get label-derived suffixes and the node and credential labels appear in tool descriptions so the agent can tell them apart.
- Tools are scoped per agent. Two agents on the same canvas only see the tools wired into their own bottom handle.
Next steps
MCP servers
Give agents tools from external MCP servers or from NoClick itself.
Channel agents
Combine a trigger node and a send-tool node of the same service.