LLM System Prompt Tuning Workflow
A well-tuned system prompt can be the difference between an LLM that gives generic responses and one that nails your use case. But finding the right prompt takes iteration: testing different instructions against real inputs and comparing outputs. This guide shows you how to build a workflow that automates this process. Put your prompts and test cases in a Google Sheet, run the workflow, and get all responses written back automatically.What You’ll Build
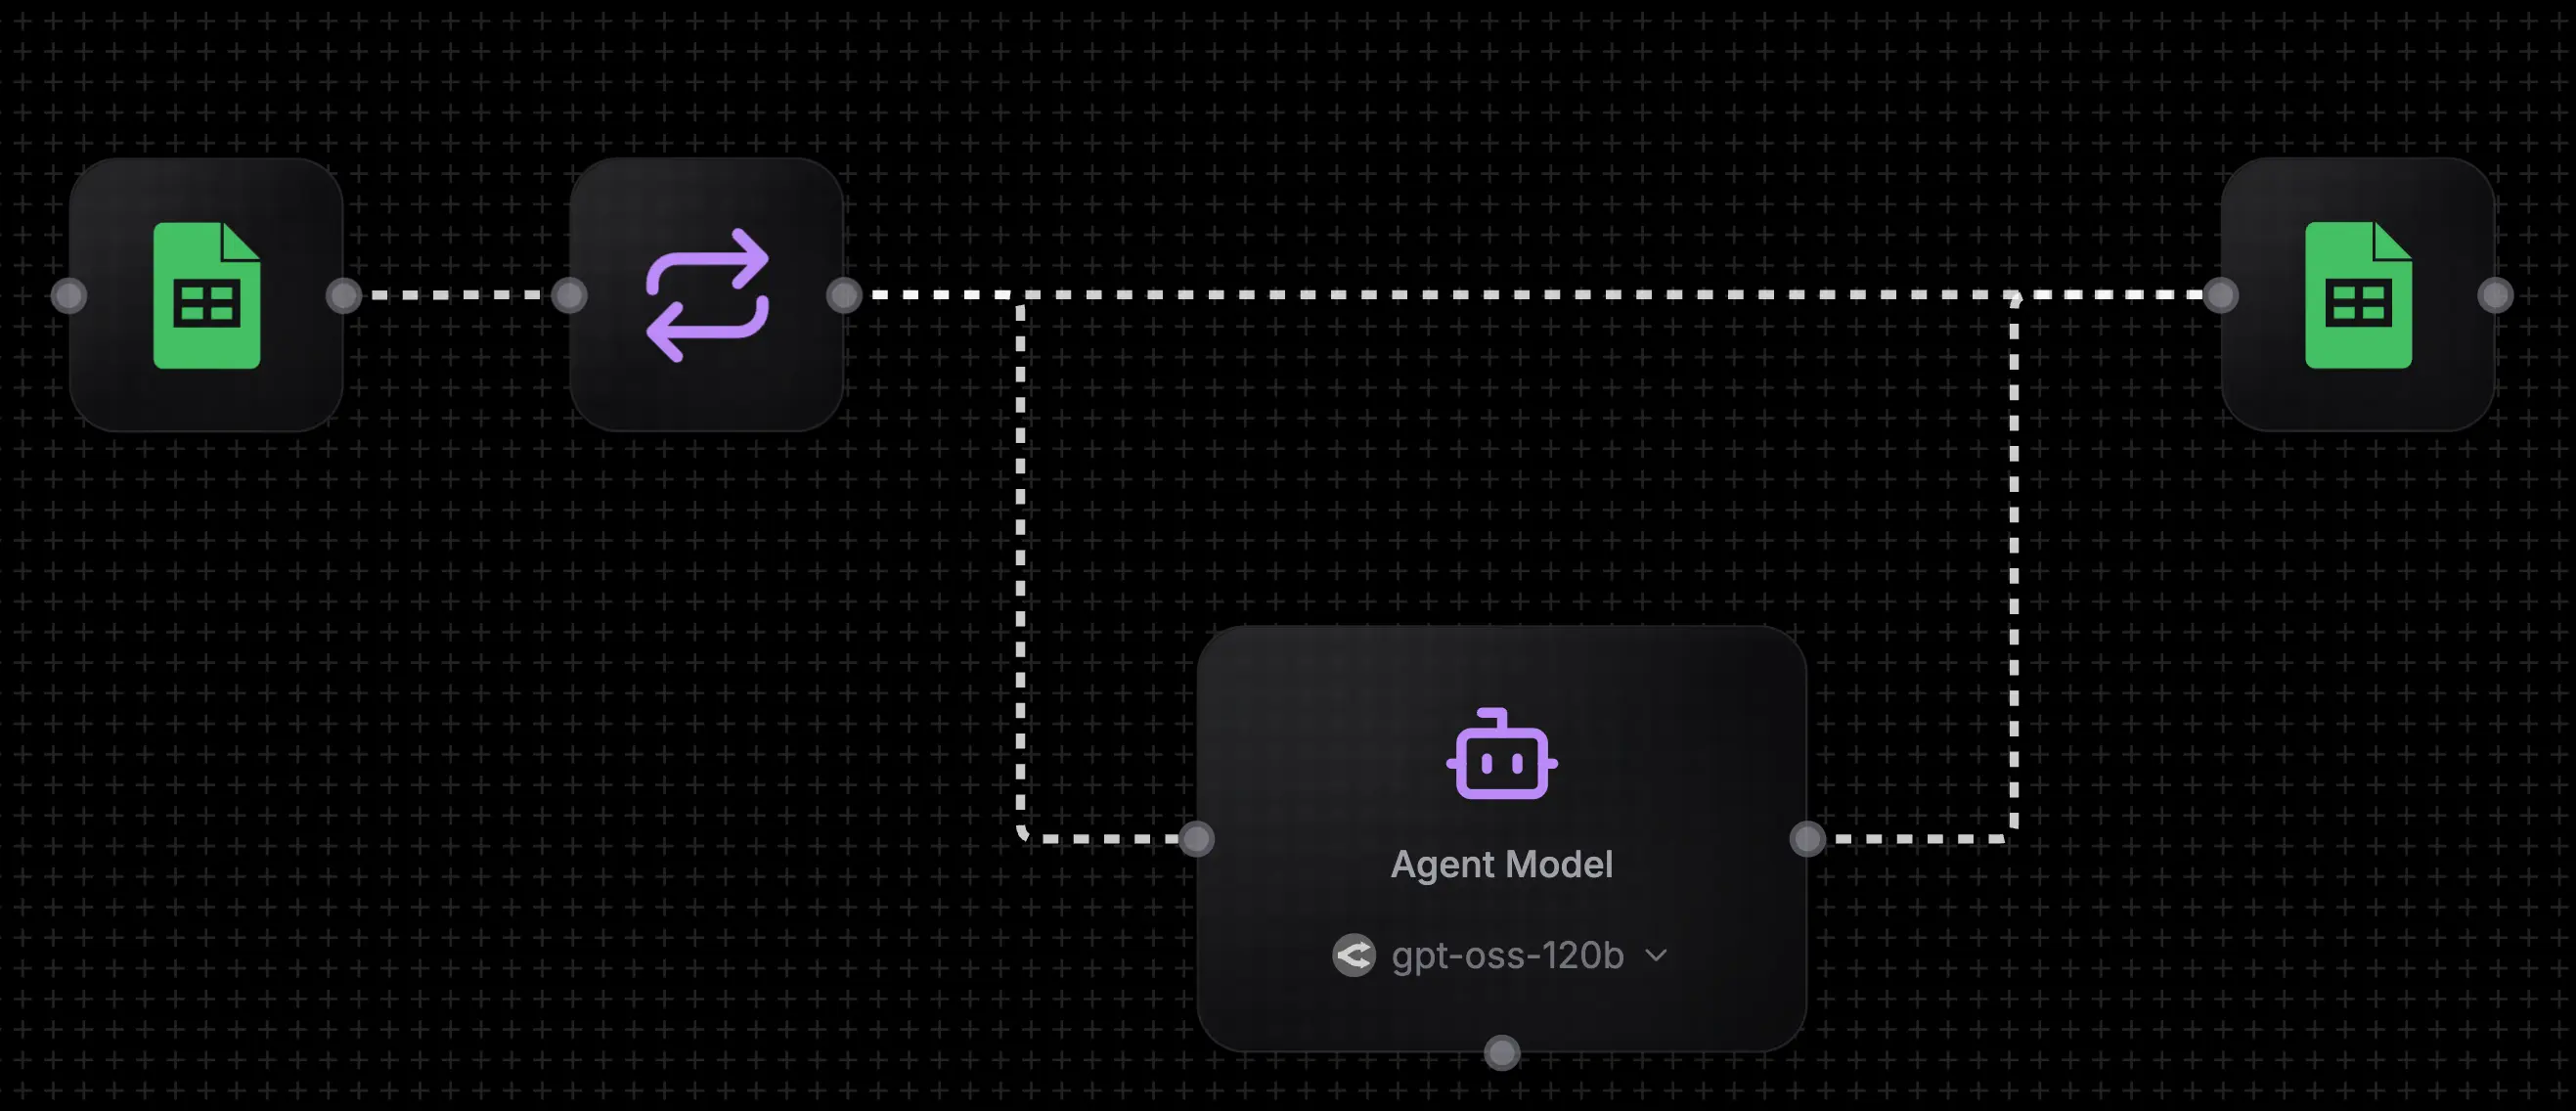
- Reads system prompts and test messages from Google Sheets
- Iterates through each row
- Sends each message to an LLM with its system prompt
- Writes the response back to your sheet
Prerequisites
- A NoClick account (sign up here)
- A Google account for Google Sheets access
Step 1: Set Up Your Google Sheet
Create a Google Sheet with four columns: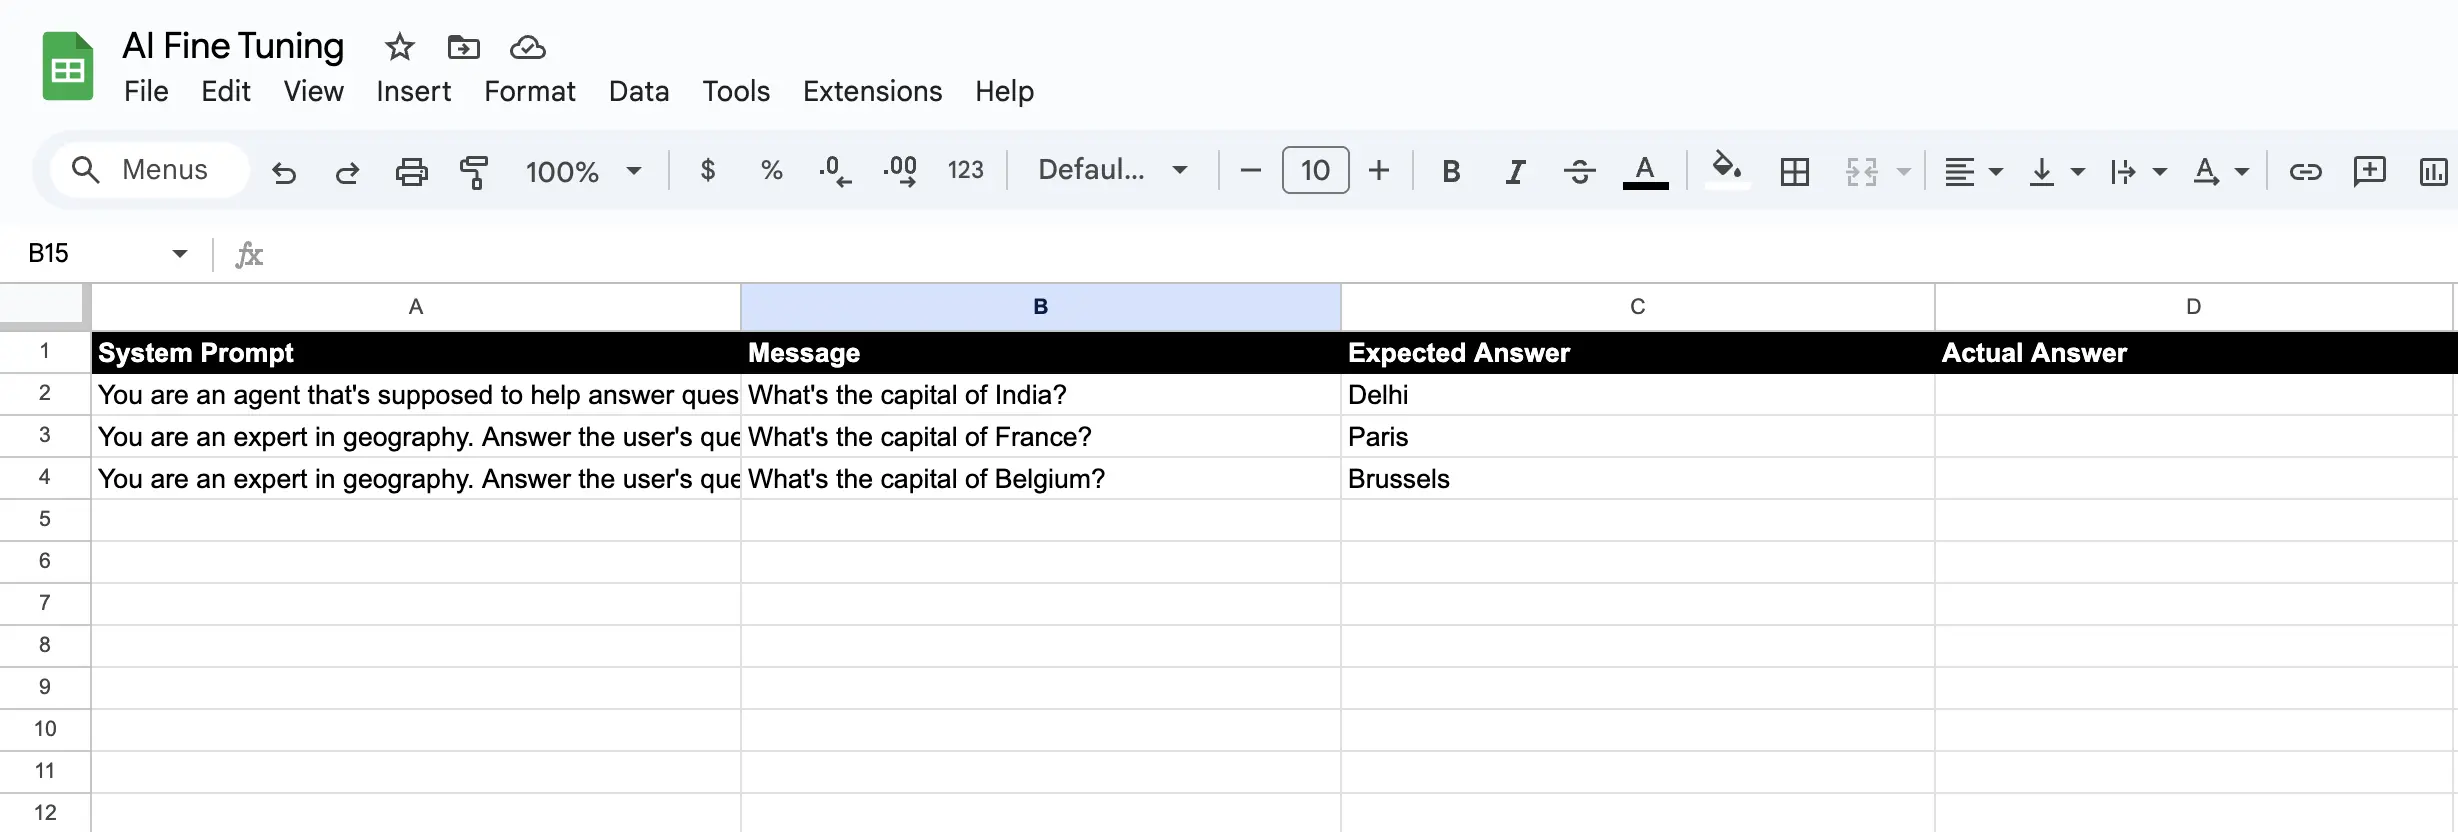
Step 2: Import the Workflow
Click to copy workflow
Click to copy workflow
Click the copy icon in the top-right corner of the code block below, then paste into NoClick.
- Create a new workflow in NoClick
- Press
Cmd/Ctrl + Vto paste the JSON - The workflow will appear in your canvas
Step 3: Connect Your Google Account
Click on either Google Sheets node and select Connect Google Account. This opens a new tab where you authorize NoClick to access your sheets.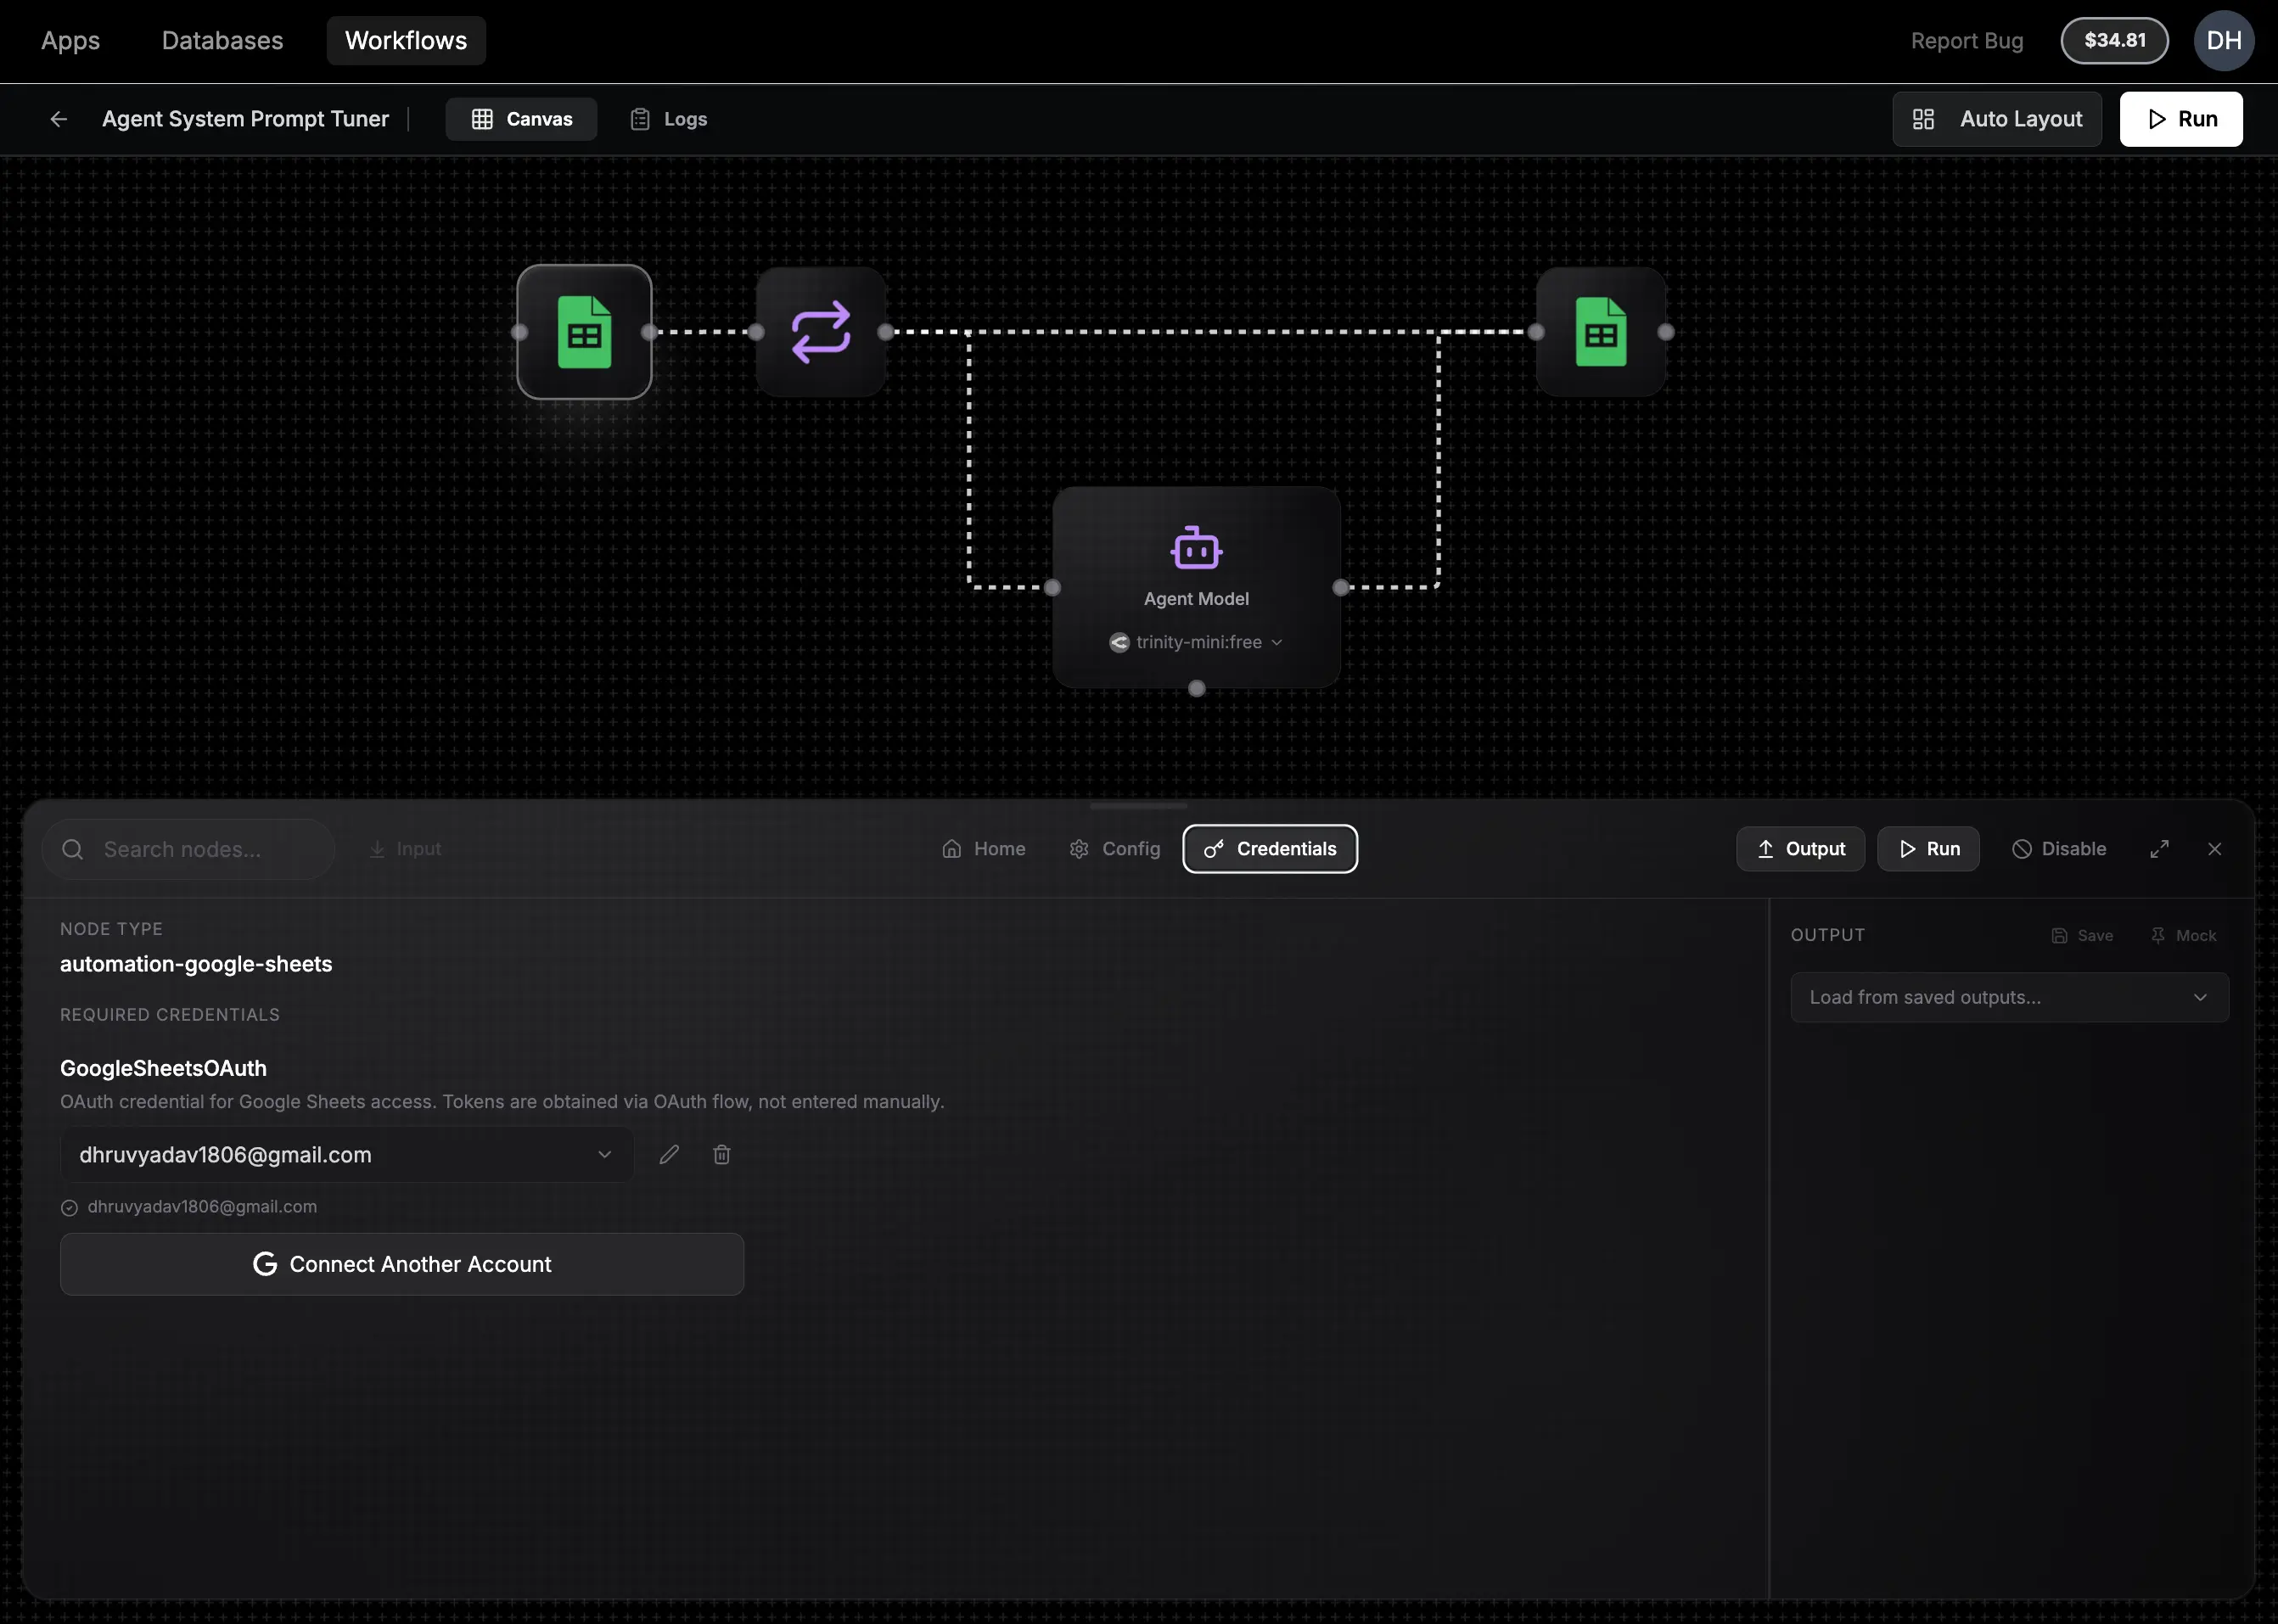
NoClick only accesses the specific sheets you select. We never store your Google credentials. We use secure OAuth tokens that you can revoke anytime.
Step 4: Configure the Sheet Nodes
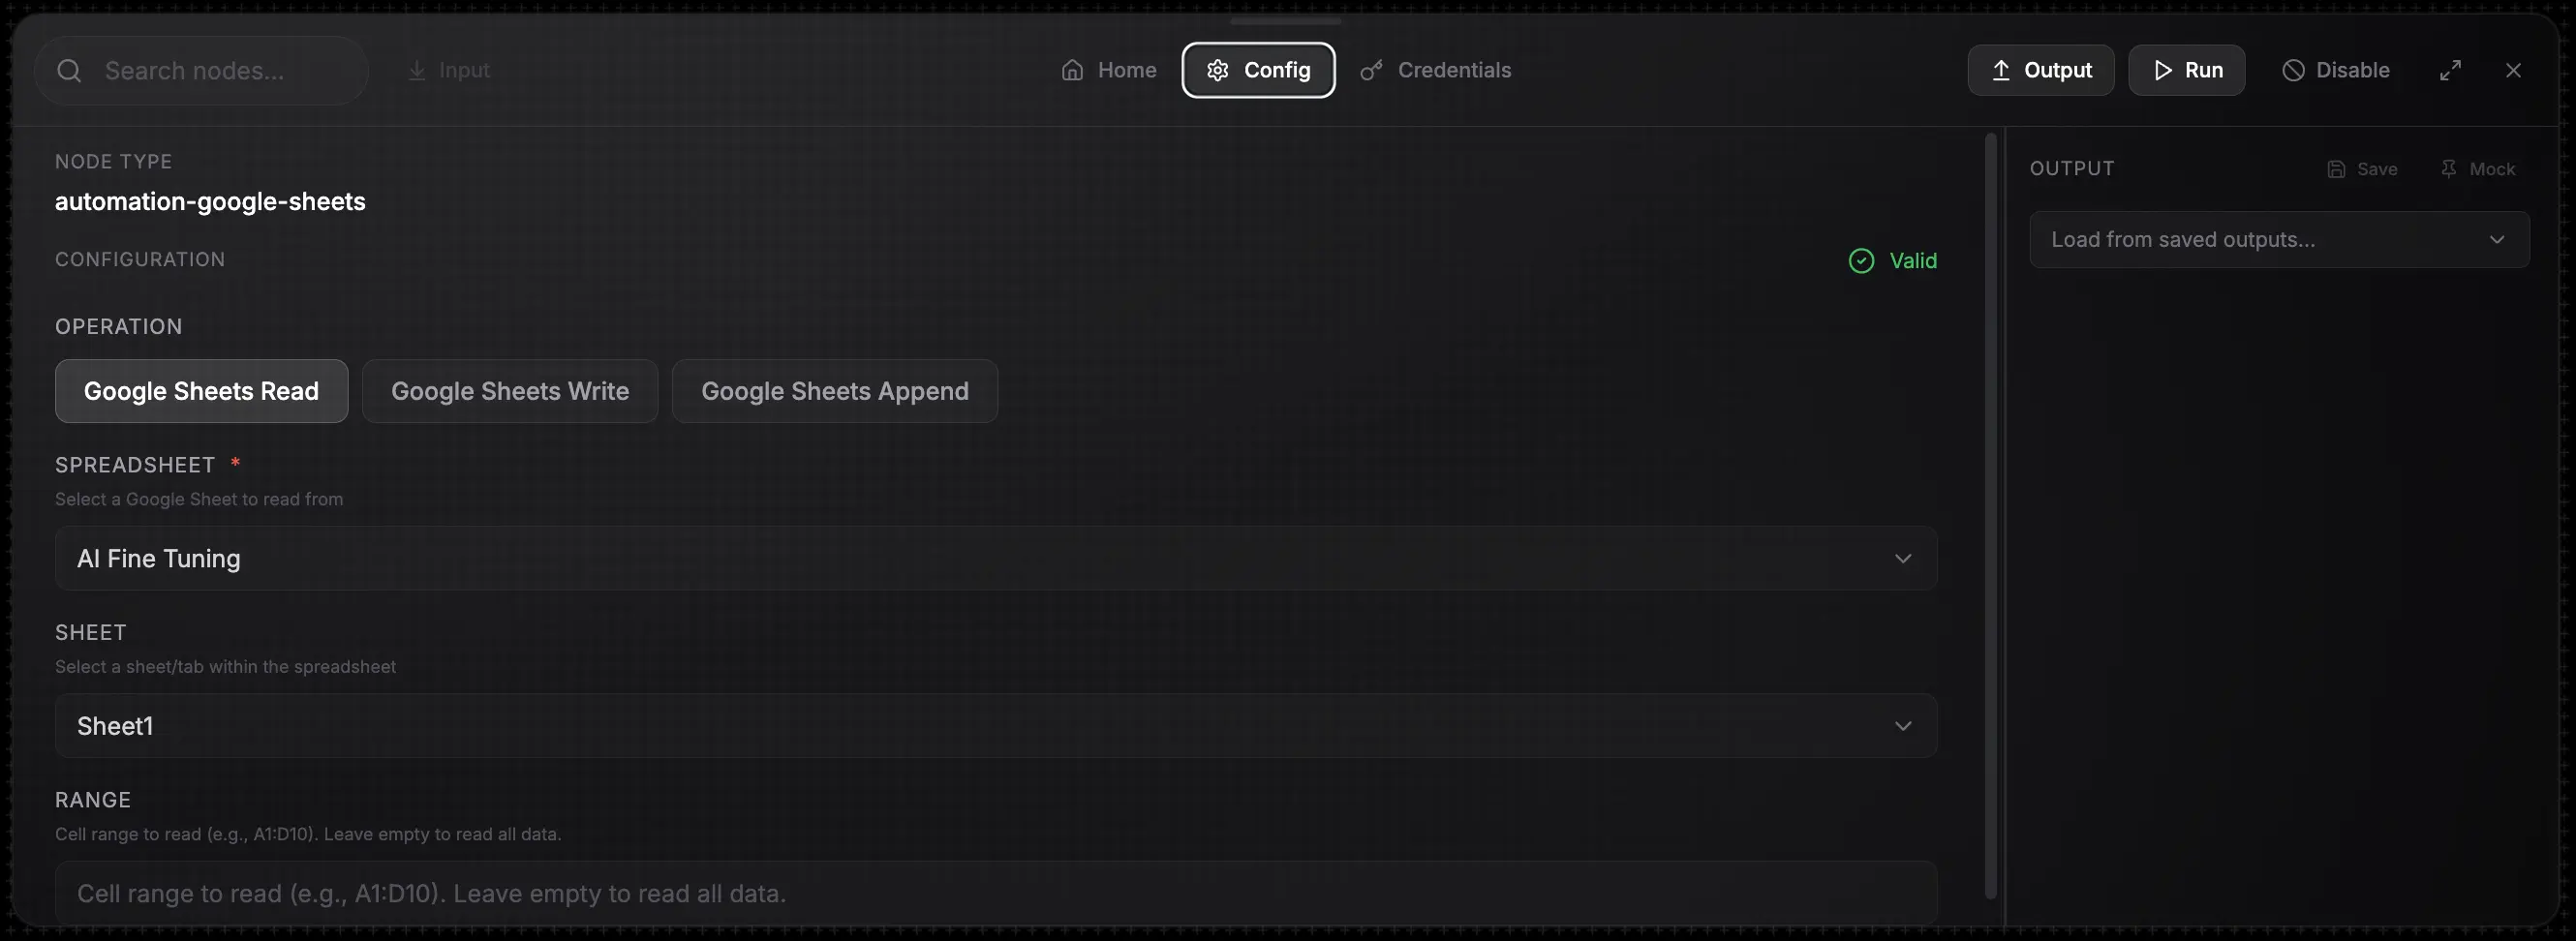
Read Node (First Google Sheets Node)
- Click the first Google Sheets node
- Select your spreadsheet from the dropdown
- Verify “Sheet1” is selected (or change to your sheet name)
Write Node (Second Google Sheets Node)
- Click the second Google Sheets node
- Select the same spreadsheet
- The range
D{{iteration.row_number}}writes to column D for each row
Step 5: Run the Workflow
Click Run in the top right corner. The workflow will:- Read all rows from your sheet
- Process up to 3 rows concurrently (configurable in the iteration node)
- Send each message with its system prompt to GPT-4o-mini
- Write responses back to column D
Step 6: Review Results
Go back to your Google Sheet. The Actual Answer column now has all your LLM outputs.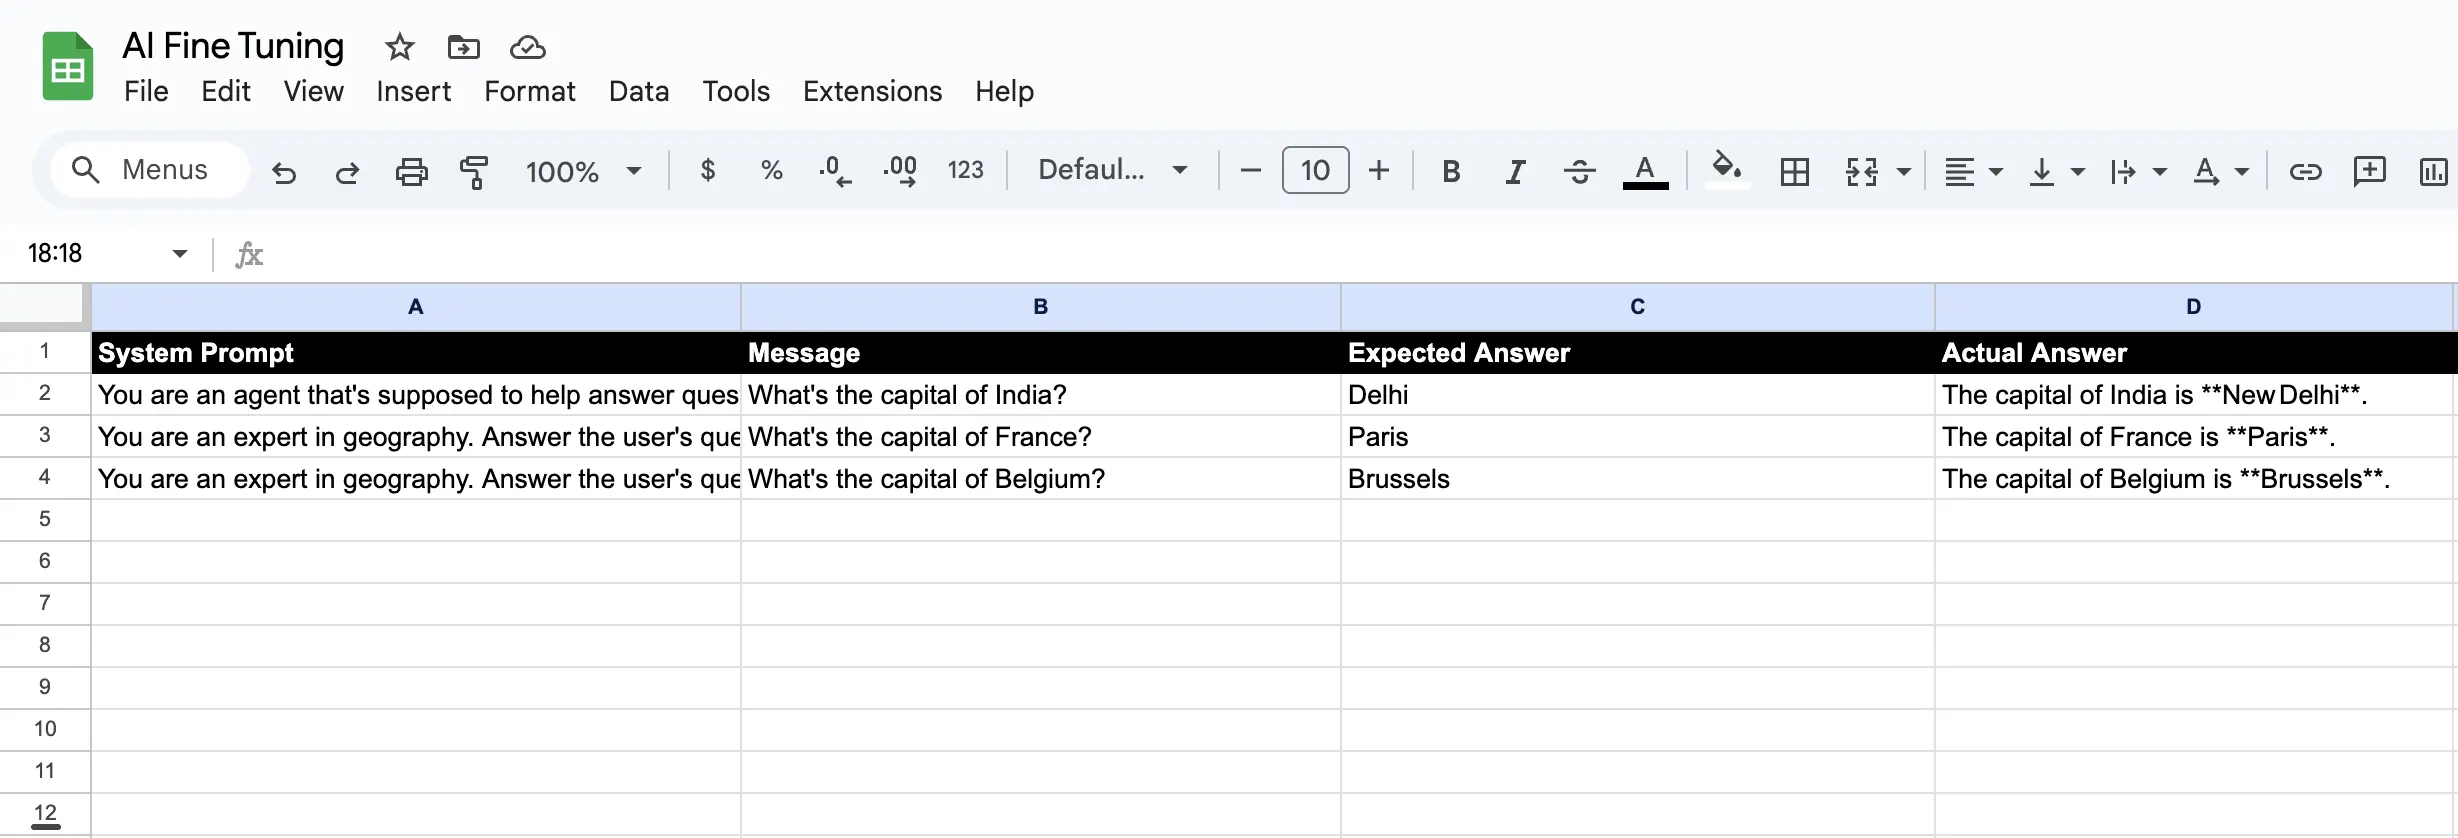
Customization Options
Change the LLM Model
Click the Agent node and select a different model:openrouter/anthropic/claude-3-5-sonnet- More capable, higher costopenrouter/openai/gpt-4o- OpenAI’s flagship modelopenrouter/google/gemini-pro- Google’s model
Adjust Concurrency
In the Iteration node, changeconcurrency to control how many requests run in parallel:
- 1: Sequential processing (slower, lower API costs)
- 3-5: Balanced (default)
- 10+: Fast but may hit rate limits
Add More Test Data
Simply add more rows to your sheet, and the workflow processes all rows with data.Next Steps
- Connect NoClick to your AI assistant to build workflows conversationally
- Explore other workflow nodes like Slack notifications, email, or webhooks
- Schedule your workflow to run automatically on a timer