Build a hosted server
Add an MCP Server node
Add an MCP Server node to the canvas and leave its Server URL field empty. An empty URL puts the node in hosting mode.
Wire in integration nodes
Drag from an integration node’s top handle into the MCP Server node’s bottom handle. You can wire in multiple nodes, each with its own credential.
Allowlist operations
Click a wired node. Its config panel switches to an operation allowlist; pick the actions the server should expose. Each becomes a tool named 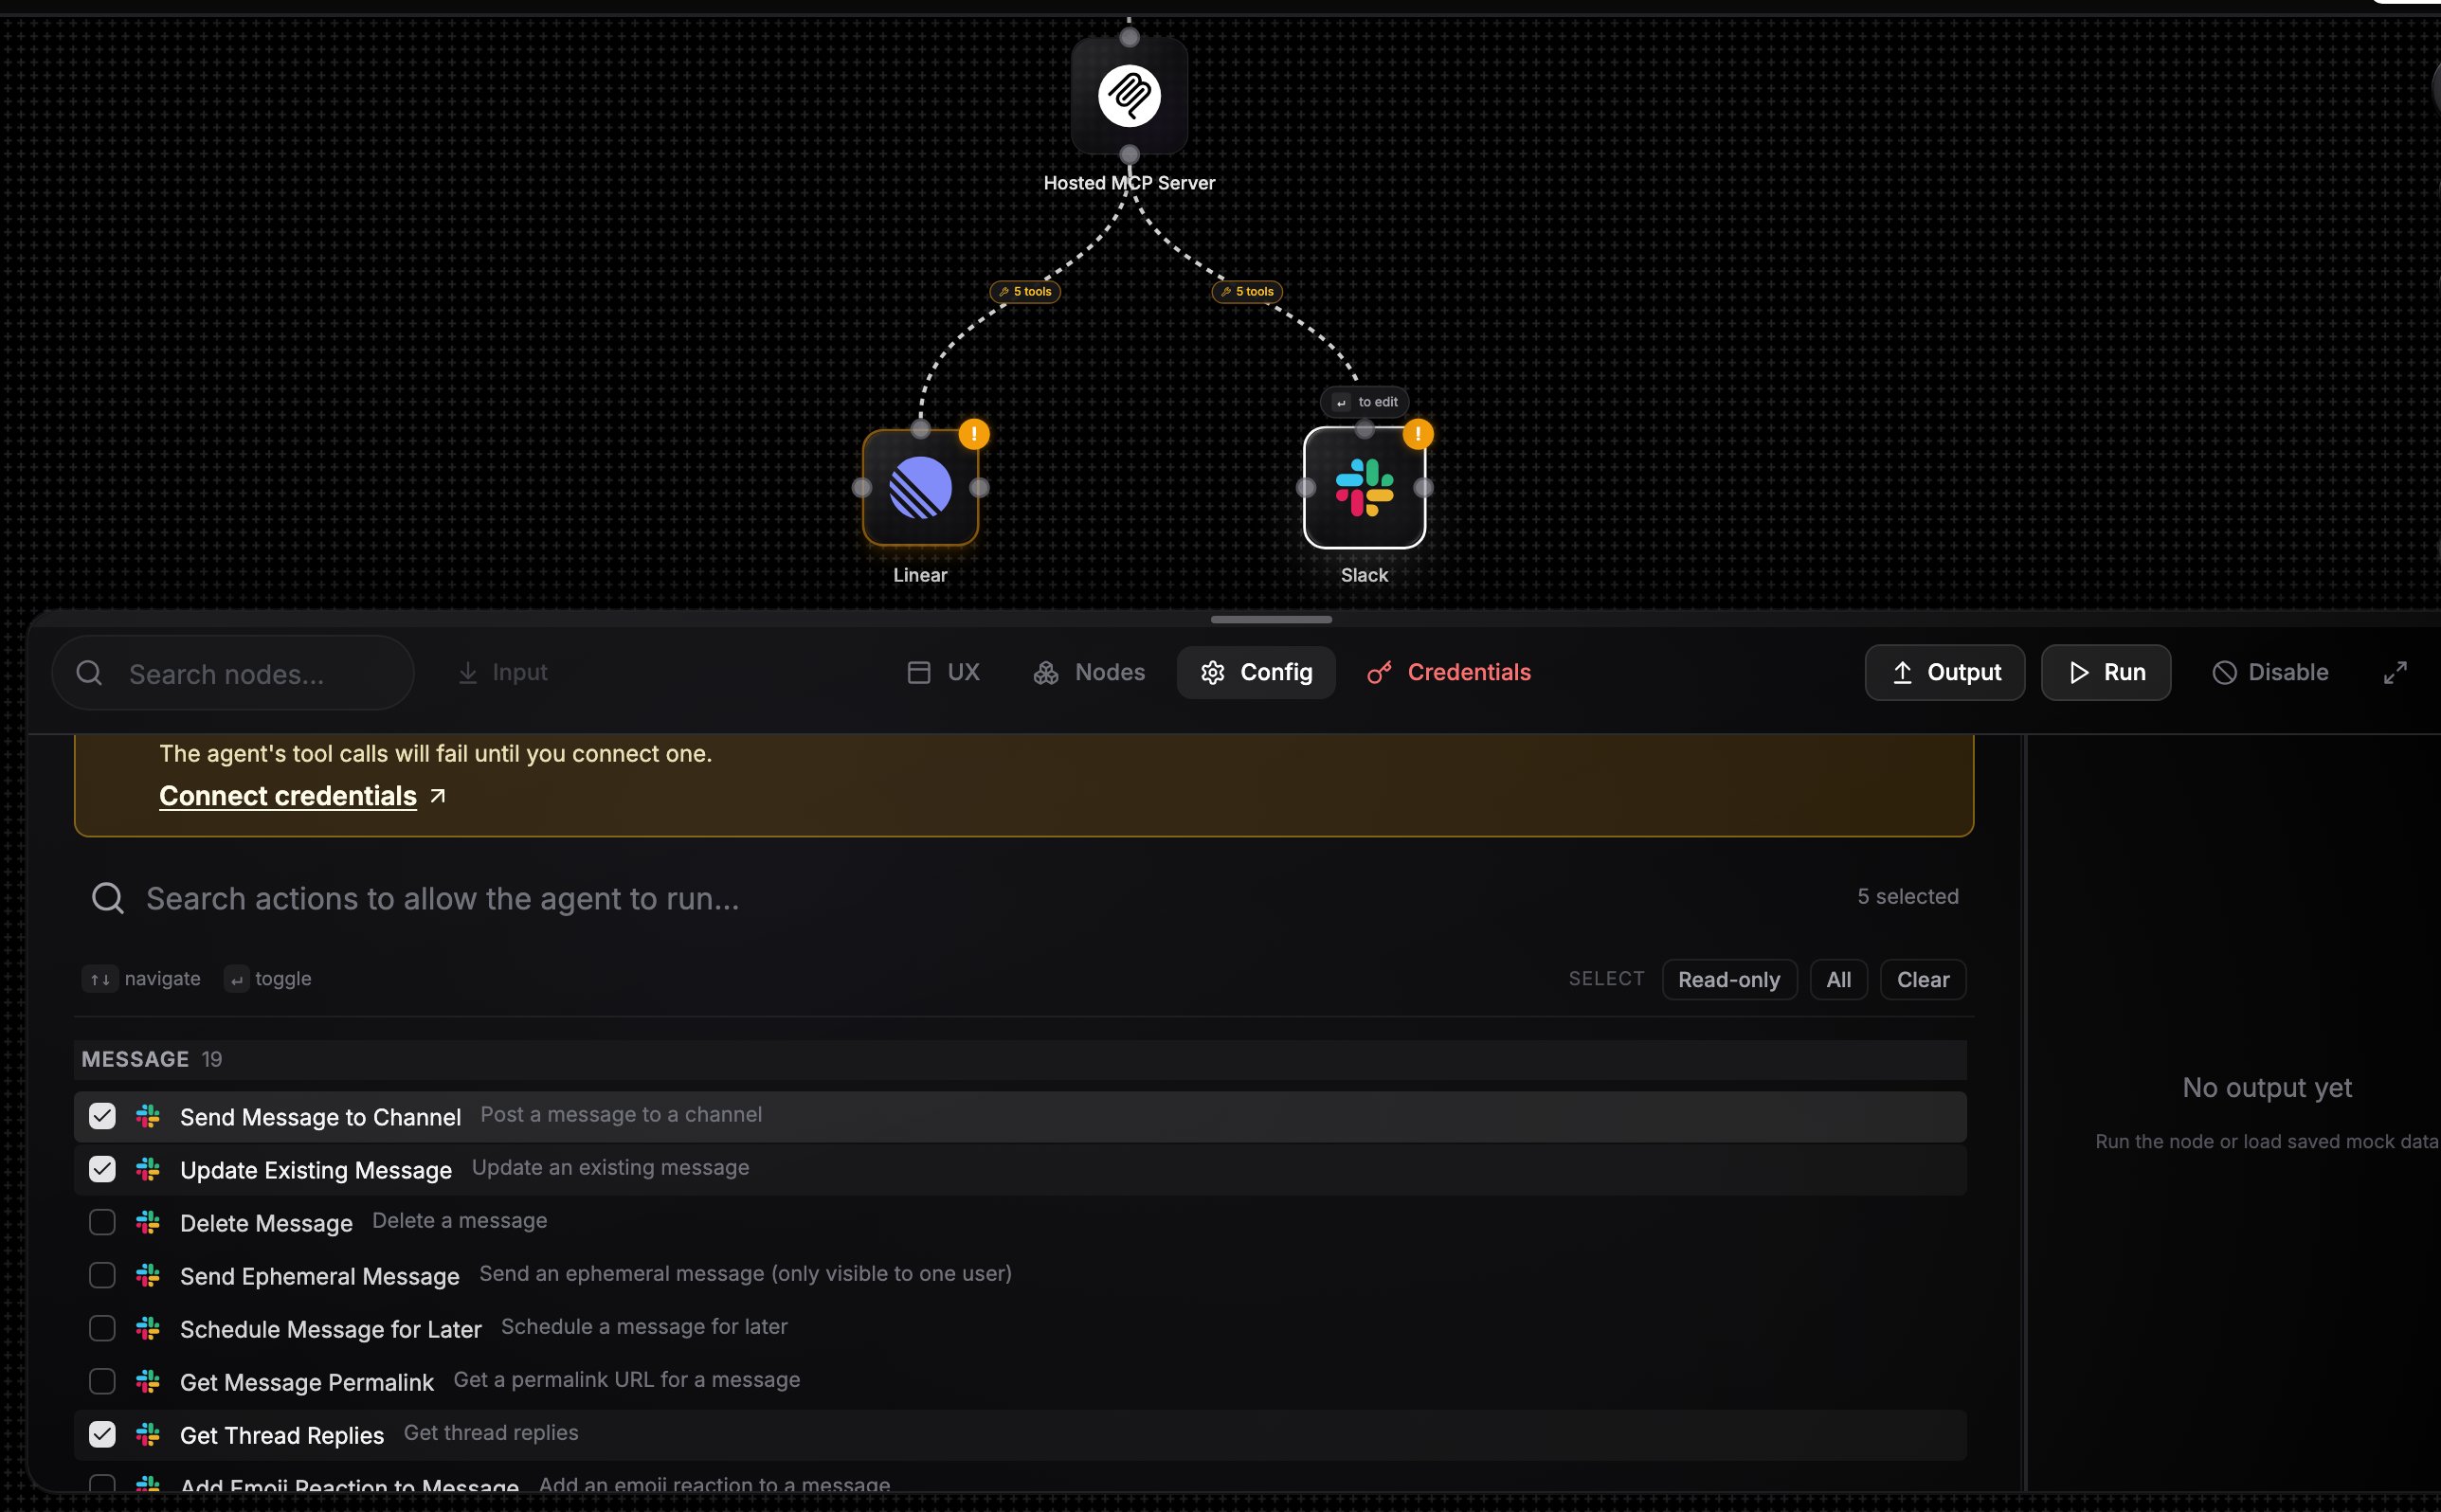
{provider}__{operation} (for example linear__create_issue), plus an automatic {provider}__lookup_options tool for resolving IDs.Copy the server URL
Select the MCP Server node and click Connect externally at the top of its config panel. The dialog mints your server URL and shows setup guides for each client: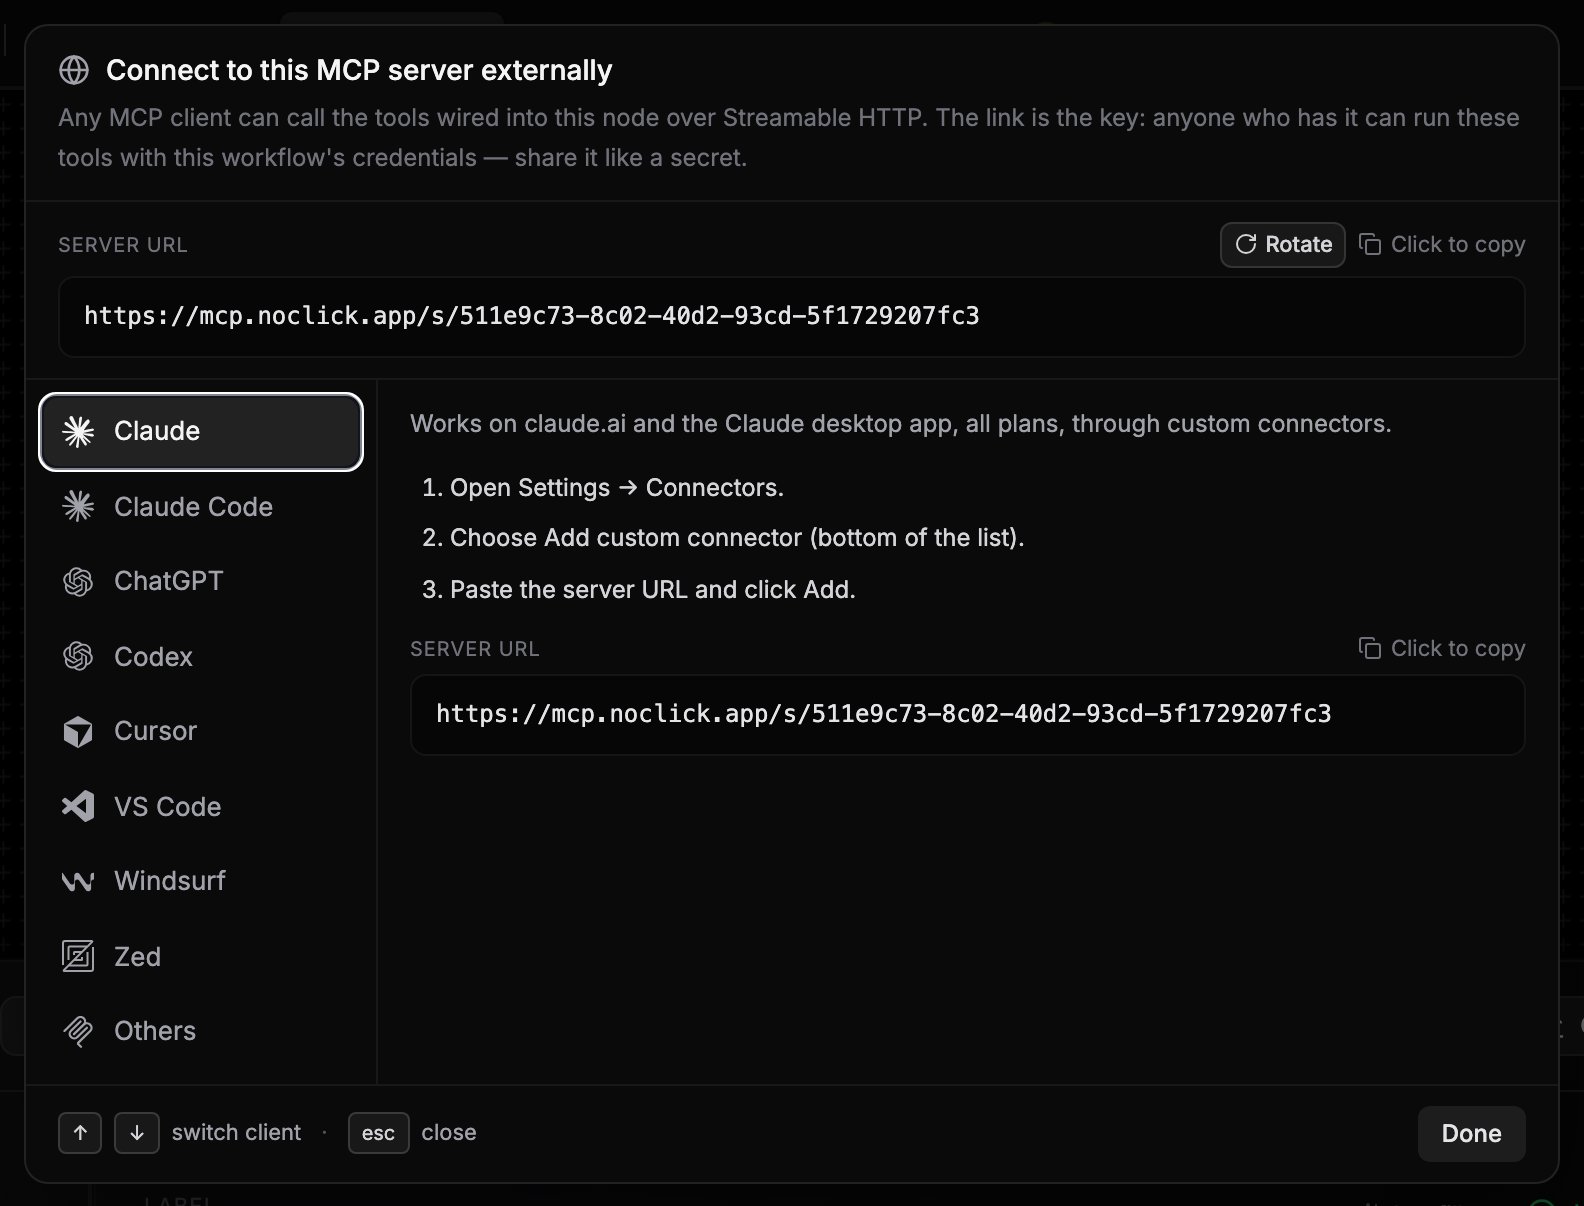
Client setup
Claude (claude.ai and the desktop app): go to Settings > Connectors, choose Add custom connector, paste the server URL, and click Add. ChatGPT: turn on Developer mode under Settings > Apps & Connectors > Advanced settings, then click Create, paste the URL as the MCP Server URL, and set Authentication to No Authentication. Cursor: add the server to.cursor/mcp.json in your project (or ~/.cursor/mcp.json for all projects):
Tools resolve live
The tool list is read from your workflow graph on every request. Adding a node, changing an allowlist, or swapping a credential applies on the client’s next tool listing, with no publish step. Draft workflows serve too.Security model
- To revoke access, click Rotate next to the URL in the Connect externally dialog. The old link stops working immediately; update every client that used it.
- Every call is audited, so you can review what was invoked and whether it succeeded.
- Only the operations you allowlist are exposed. Keep the list minimal.
External mode
The same node has a second, mutually exclusive mode: set Server URL to an external MCP server endpoint and the node proxies that server’s tools to AI agents in your workflow instead. External mode supports Streamable HTTP and SSE transports, API key or OAuth authentication, a tool name prefix, and a tool filter. One node cannot do both. If it has a Server URL and wired tool nodes at the same time, it returns an error instead of picking a side. Use two MCP Server nodes if you need both.Next steps
Agent tools
Wire the same integrations directly into an AI agent instead.
External MCP servers for agents
Give your agents tools from external MCP servers.