> ## Documentation Index
> Fetch the complete documentation index at: https://docs.noclick.com/llms.txt
> Use this file to discover all available pages before exploring further.
# The workflow canvas
> Add nodes, connect them with edges, and organize your workflow on the visual canvas.
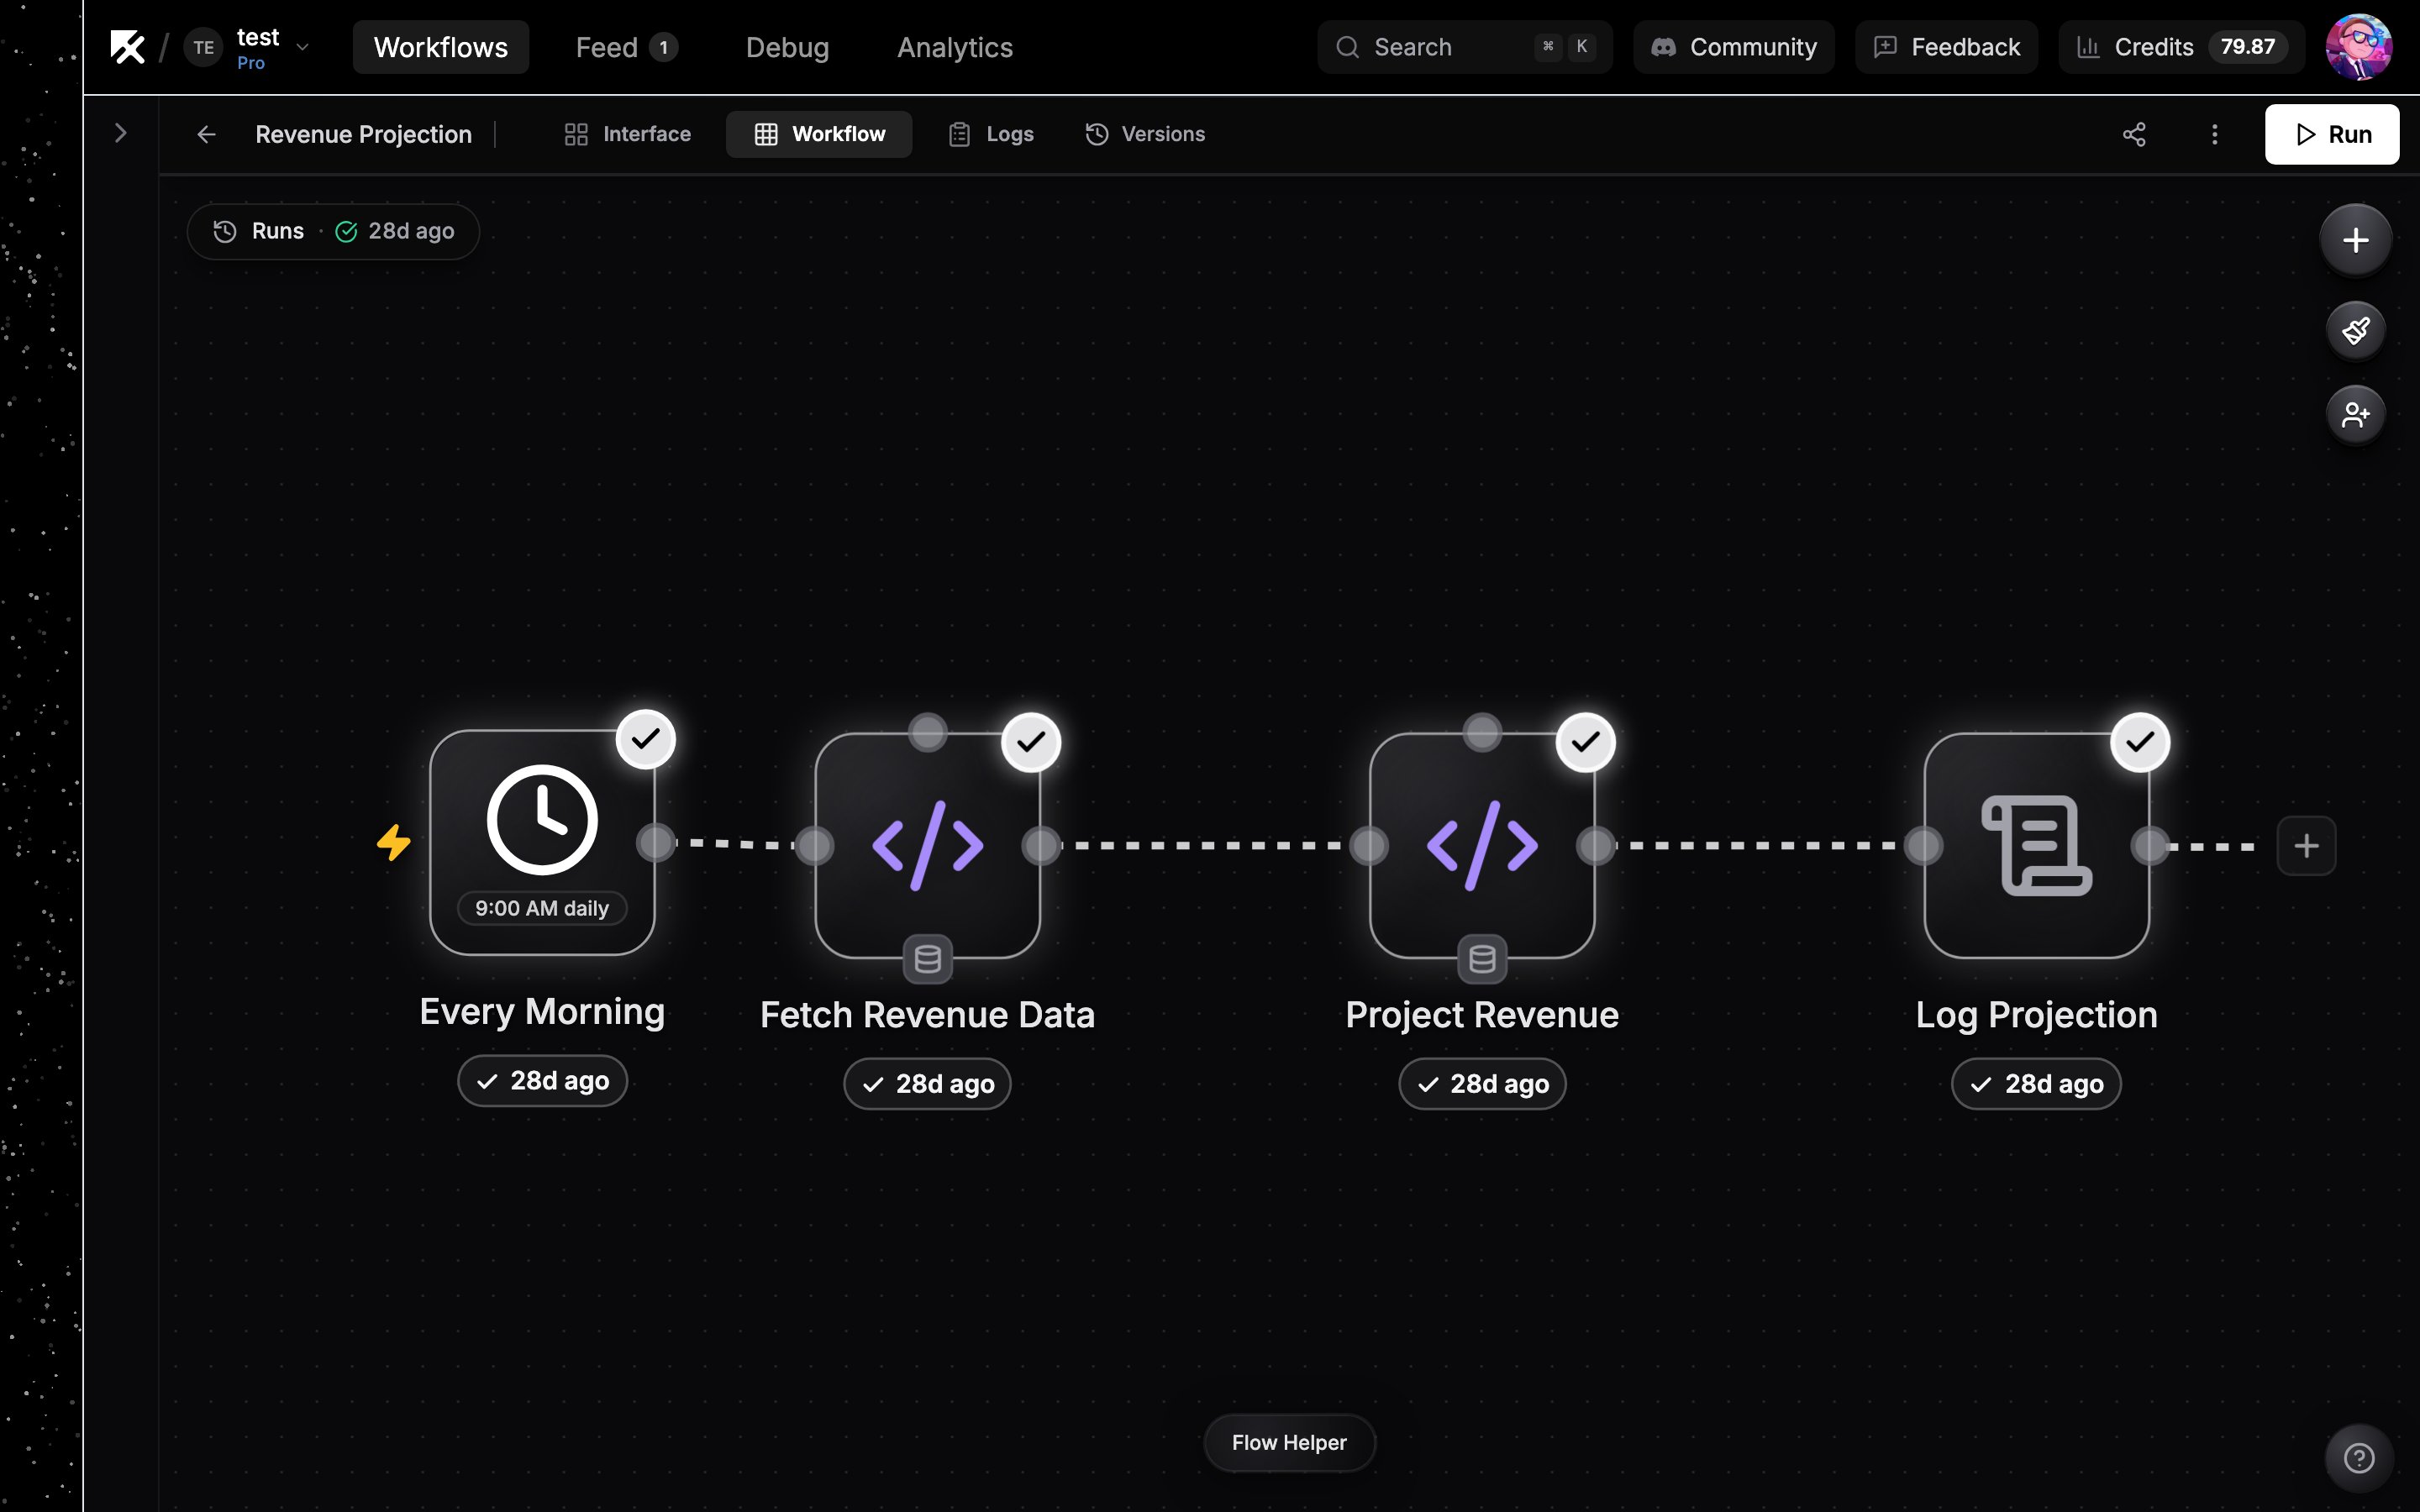
The **Workflow** tab is the visual editor: every step in your automation is a node, and edges carry data between them. The AI builder edits the same canvas, so you can switch between describing changes and making them by hand at any time.
 ## The top bar
| Tab | Shortcut | What it shows |
| ------------- | -------- | --------------------------------------------------------------- |
| **Interface** | `I` | The app view: forms, dashboards, and UI blocks |
| **Workflow** | `W` | The node canvas |
| **Logs** | `L` | Past runs, see [Execution logs](/editor/execution-logs) |
| **Versions** | `V` | Saved snapshots, see [Version history](/editor/version-history) |
| **Resources** | | Uploaded files; appears once the workflow has resources |
| **Setup** | `S` | Appears while required fields are still unfilled |
On the right you'll find collaborator avatars, **Share**, the `⋮` menu, and the **Run** button (see [Running and testing](/editor/running-and-testing)).
## Adding nodes
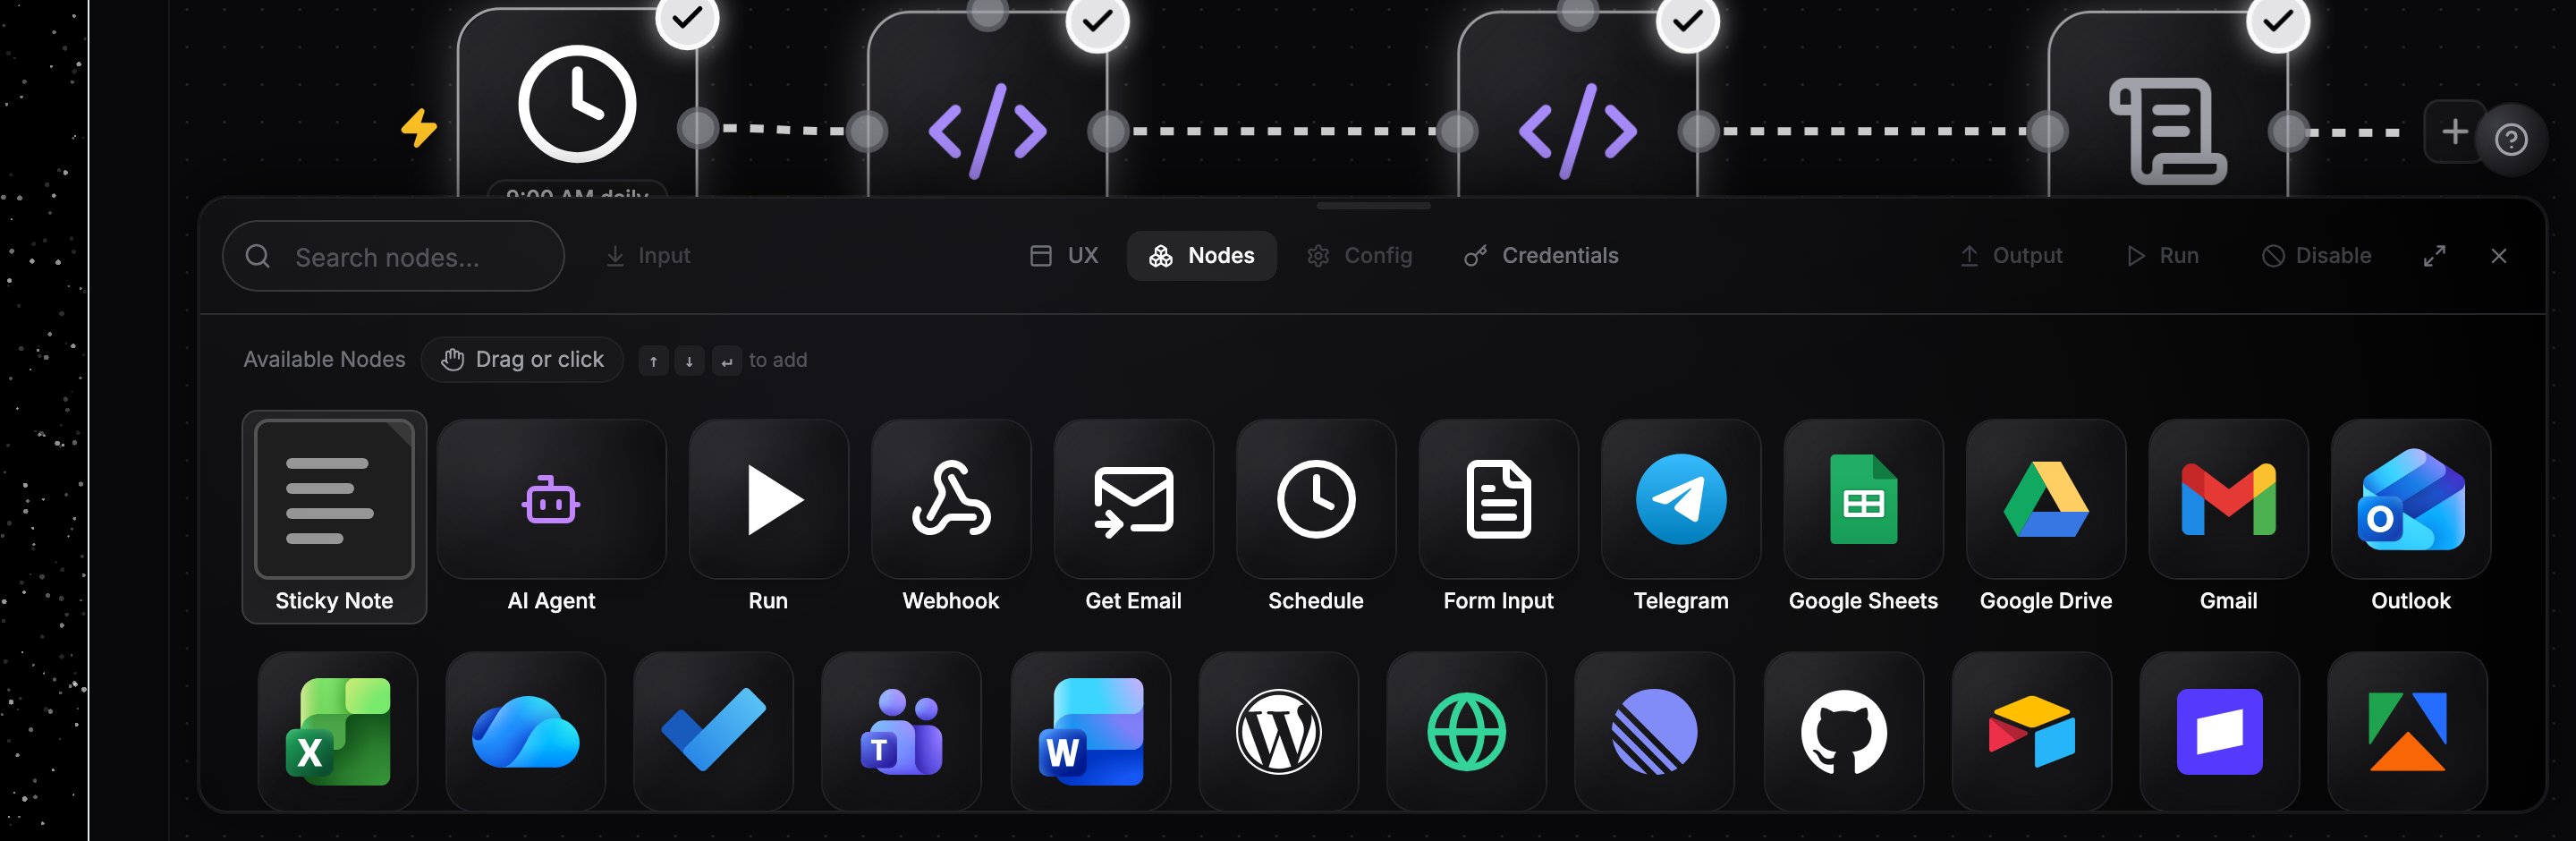
Press `N`, or click **Flow Helper** at the bottom of the canvas and open the **Nodes** tab.
Type the integration or building block you want. Matching operations are searchable too.
Click a tile to add the node, or drag it to a spot on the canvas.
Select a node and press `N` (or click the dashed `+` to its right) and the new node is added already connected after it.
## The top bar
| Tab | Shortcut | What it shows |
| ------------- | -------- | --------------------------------------------------------------- |
| **Interface** | `I` | The app view: forms, dashboards, and UI blocks |
| **Workflow** | `W` | The node canvas |
| **Logs** | `L` | Past runs, see [Execution logs](/editor/execution-logs) |
| **Versions** | `V` | Saved snapshots, see [Version history](/editor/version-history) |
| **Resources** | | Uploaded files; appears once the workflow has resources |
| **Setup** | `S` | Appears while required fields are still unfilled |
On the right you'll find collaborator avatars, **Share**, the `⋮` menu, and the **Run** button (see [Running and testing](/editor/running-and-testing)).
## Adding nodes
Press `N`, or click **Flow Helper** at the bottom of the canvas and open the **Nodes** tab.
Type the integration or building block you want. Matching operations are searchable too.
Click a tile to add the node, or drag it to a spot on the canvas.
Select a node and press `N` (or click the dashed `+` to its right) and the new node is added already connected after it.
 ## Connecting nodes
Drag from the handle on a node's right edge to the next node's left edge to create an edge. Data flows left to right; downstream nodes read upstream output through [references](/editor/data-references). The dashed stub next to a node also works as a drag source.
You do not have to land exactly on the small handle dot. Release the drag anywhere on the target node's body and NoClick connects it to the right handle for you, picking the matching input or output based on where you drop.
## Selecting and moving
Click a node to select it, drag to move it. Drag on empty canvas to box-select multiple nodes. Trackpad scroll pans, pinch zooms, and middle-drag or `Cmd/Ctrl` + drag pans. Arrow keys jump between nodes and `Enter` opens the selected node's config.
## Right-click menus
Right-click the canvas for a context menu with the actions that fit what you clicked:
* **Empty canvas:** **Add node**, **Add sticky note**, **Paste**, **Select all**, **Auto-layout**, **Fit view**.
* **A node:** **Open**, **Run from this node**, **Duplicate**, **Copy**, **Cut**, **Disable** or **Enable**, **Rename**, **Delete**. Sticky notes show only the actions that apply to them.
* **A multi-node selection:** **Duplicate**, **Copy**, **Cut**, **Disable**/**Enable**, and **Delete**, applied to every selected node at once.
## Auto-layout
Click the `⋮` menu in the top bar and choose **Auto-layout** to tidy the graph automatically. You can also right-click empty canvas and choose **Auto-layout**.
## Sticky notes
The sticky note is the first tile in the node palette. Drop one anywhere to annotate the canvas, double-click it to edit the text, and drag its corner to resize. Sticky notes never execute.
## Next steps
Pick operations, fill fields, and connect credentials.
The full shortcut reference for the editor.
## Connecting nodes
Drag from the handle on a node's right edge to the next node's left edge to create an edge. Data flows left to right; downstream nodes read upstream output through [references](/editor/data-references). The dashed stub next to a node also works as a drag source.
You do not have to land exactly on the small handle dot. Release the drag anywhere on the target node's body and NoClick connects it to the right handle for you, picking the matching input or output based on where you drop.
## Selecting and moving
Click a node to select it, drag to move it. Drag on empty canvas to box-select multiple nodes. Trackpad scroll pans, pinch zooms, and middle-drag or `Cmd/Ctrl` + drag pans. Arrow keys jump between nodes and `Enter` opens the selected node's config.
## Right-click menus
Right-click the canvas for a context menu with the actions that fit what you clicked:
* **Empty canvas:** **Add node**, **Add sticky note**, **Paste**, **Select all**, **Auto-layout**, **Fit view**.
* **A node:** **Open**, **Run from this node**, **Duplicate**, **Copy**, **Cut**, **Disable** or **Enable**, **Rename**, **Delete**. Sticky notes show only the actions that apply to them.
* **A multi-node selection:** **Duplicate**, **Copy**, **Cut**, **Disable**/**Enable**, and **Delete**, applied to every selected node at once.
## Auto-layout
Click the `⋮` menu in the top bar and choose **Auto-layout** to tidy the graph automatically. You can also right-click empty canvas and choose **Auto-layout**.
## Sticky notes
The sticky note is the first tile in the node palette. Drop one anywhere to annotate the canvas, double-click it to edit the text, and drag its corner to resize. Sticky notes never execute.
## Next steps
Pick operations, fill fields, and connect credentials.
The full shortcut reference for the editor.