> ## Documentation Index
> Fetch the complete documentation index at: https://docs.noclick.com/llms.txt
> Use this file to discover all available pages before exploring further.
# Organizations
> Create a shared team workspace with members, roles, organization-owned workflows, and centralized billing.
An organization is a shared workspace for your team. Workflows created inside it belong to the organization, every member can access them, and the organization has its own plan and billing.
## Create an organization
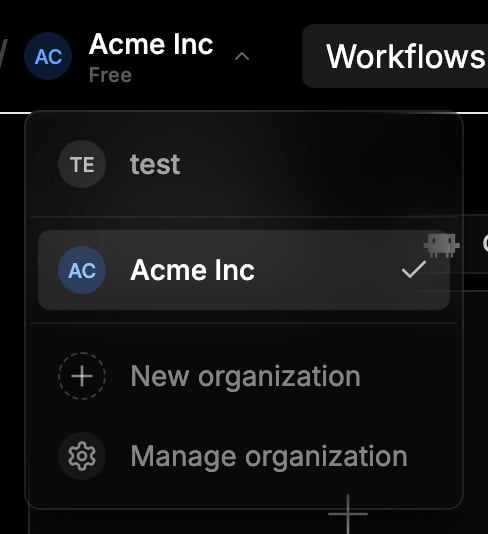
Click your name at the top of the sidebar, then choose **New organization**.
In the **Create Organization** dialog, enter an **Organization Name** and an **Identifier**. The identifier is checked for availability as you type, is used for your SSO login URL, and cannot be changed later.
Click **Create**. You become the organization's owner and switch into the new workspace.
How many organizations you can create depends on your personal plan: 1 on Free and Plus, 3 on Pro, unlimited on Enterprise.
 ## Switch workspaces
The same switcher moves you between your personal workspace and your organizations. Your dashboard is scoped to the active workspace: workflows you create while inside an organization are owned by the organization and visible to all of its members.
## Invite members
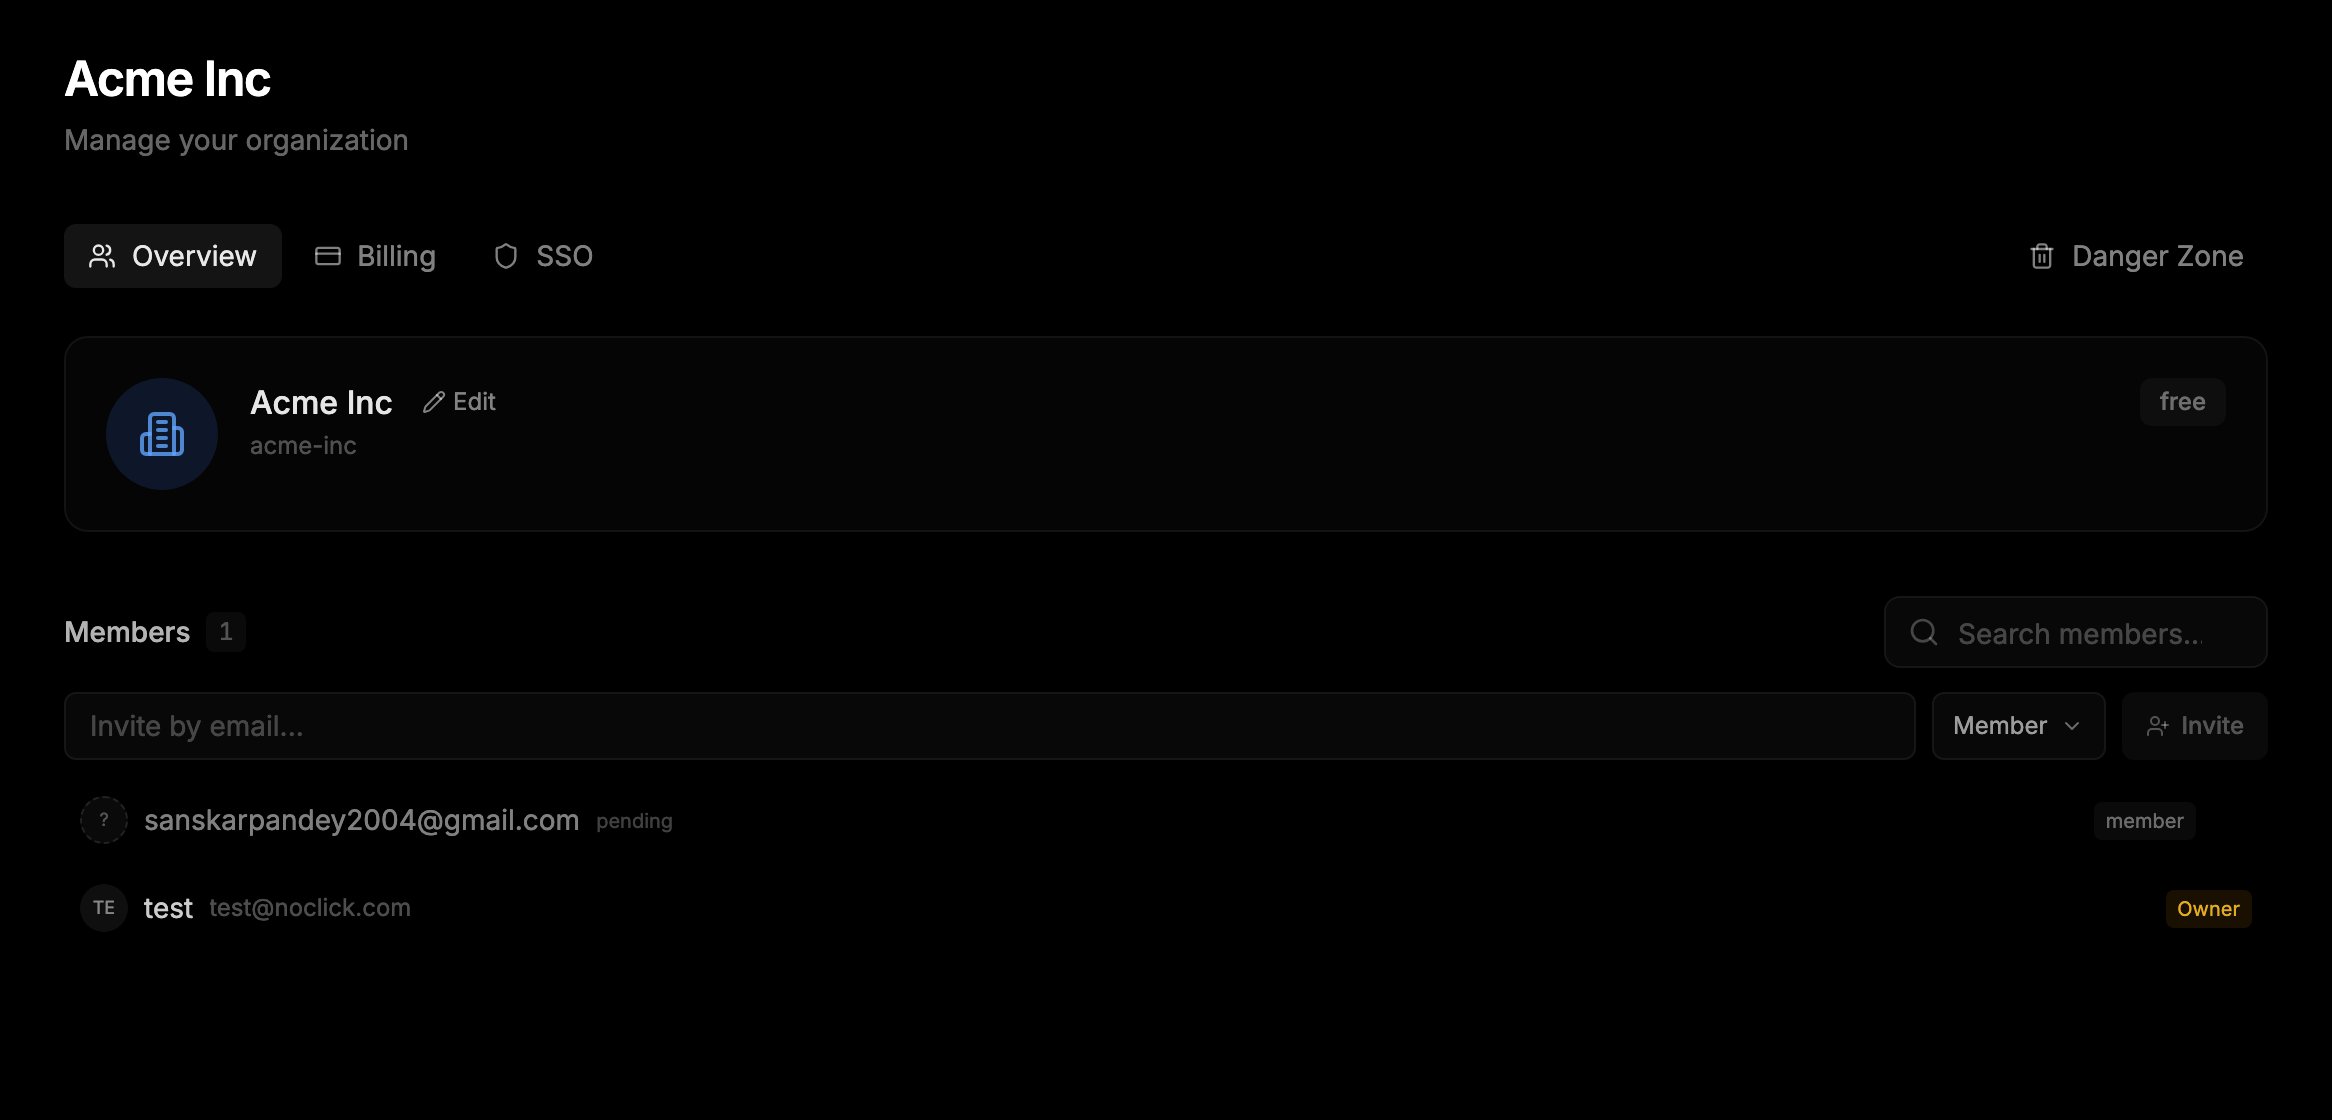
Open **Settings → Organization** while in the organization workspace. On the **Overview** tab:
1. Enter an address in **Invite by email...**, pick **Member** or **Admin**, and click **Invite**.
2. The recipient gets an email with an invite link. They sign in and accept on the invite page.
3. Pending invites appear above the member list with a "pending" label; hover one to revoke it. Invites expire after 7 days.
## Switch workspaces
The same switcher moves you between your personal workspace and your organizations. Your dashboard is scoped to the active workspace: workflows you create while inside an organization are owned by the organization and visible to all of its members.
## Invite members
Open **Settings → Organization** while in the organization workspace. On the **Overview** tab:
1. Enter an address in **Invite by email...**, pick **Member** or **Admin**, and click **Invite**.
2. The recipient gets an email with an invite link. They sign in and accept on the invite page.
3. Pending invites appear above the member list with a "pending" label; hover one to revoke it. Invites expire after 7 days.
 ### Member limits
Member limits follow the organization's plan. Pending invites count toward the limit.
| Plan | Members |
| ---------- | --------- |
| Free | 3 |
| Plus | 3 |
| Pro | 5 |
| Enterprise | Unlimited |
### Roles
* **Owner**: full control, including billing, ownership transfer, and deleting the organization.
* **Admin**: manage members, organization settings, and SSO.
* **Member**: use and build the organization's workflows.
## Billing
The organization has its own subscription, separate from your personal plan. Owners and admins manage it on the **Billing** tab of the organization settings.
Credits work on an "owner pays" model: organization workflows always draw from the organization owner's credit pool, no matter which member runs them. See [Plans](/billing/plans).
## SSO
Organizations can require SAML 2.0 single sign-on, configured on the **SSO** tab of the organization settings. Follow the [SSO setup guide](/guides/sso-setup) for Okta, Azure AD, and other identity providers.
## Next steps
Share individual workflows outside an organization.
Configure SAML single sign-on for your organization.
### Member limits
Member limits follow the organization's plan. Pending invites count toward the limit.
| Plan | Members |
| ---------- | --------- |
| Free | 3 |
| Plus | 3 |
| Pro | 5 |
| Enterprise | Unlimited |
### Roles
* **Owner**: full control, including billing, ownership transfer, and deleting the organization.
* **Admin**: manage members, organization settings, and SSO.
* **Member**: use and build the organization's workflows.
## Billing
The organization has its own subscription, separate from your personal plan. Owners and admins manage it on the **Billing** tab of the organization settings.
Credits work on an "owner pays" model: organization workflows always draw from the organization owner's credit pool, no matter which member runs them. See [Plans](/billing/plans).
## SSO
Organizations can require SAML 2.0 single sign-on, configured on the **SSO** tab of the organization settings. Follow the [SSO setup guide](/guides/sso-setup) for Okta, Azure AD, and other identity providers.
## Next steps
Share individual workflows outside an organization.
Configure SAML single sign-on for your organization.